One of the challenges of living in a tiny house built in the 1950’s that has been neglected since it’s last remodel in the 1980’s is finding a place to store your tools and hobby supplies that isn’t wet, and mostly bug infested. Sure, you can downsize, but the tools have to stay if the house and property are ever going to be repaired, and for me, 3 years without home brewing was long enough.
Our storage options were the old collapsing barn:
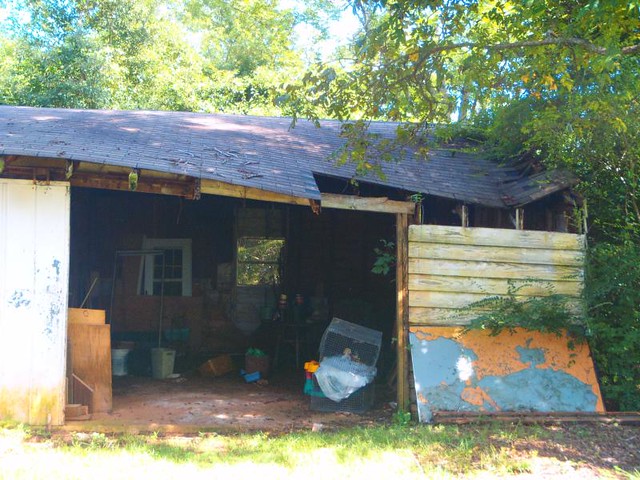
And the tin shed:

I don’t like going into the tin shed especially because it’s like going into a molding spider cave. I half expect to get in there and then turn around to find Shelob blocking the entrance. In a scenario like that I suppose I could throw what ever I went in to get at her, to give me enough time to bust out the rotten side walls…but I’d rather not have such a nasty encounter in the first place.
That’s why we have pretty much kept anything valuable and that we regularly use in the back add-on to the house. At least it’s not dark and molding. But there are a number of problems with this solution too.
First of all, imagine most of this stuff in a roughly 10 by 12 room:
The add-on also houses our washer and dryer, a small freezer, and the cat:
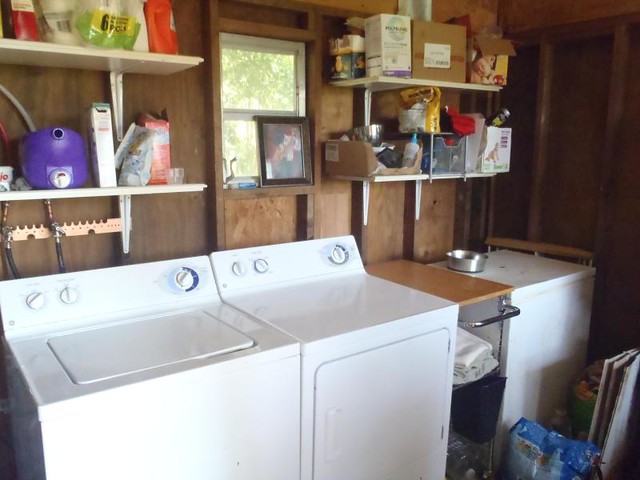
By the time we put all our tools in there, Dani’s projects, and my recently reacquired brewing equipment, we had a small walk way just large enough to guarantee a banged knee every time we tried to find something. Add all that to the fact that the add-on is only in slightly better condition than the two outbuildings, eventually needing to be torn down and re-built, and you can see why I was pretty excited when I learned that my father-in-law was coming out to stay with us for a month while Phinehas made his world debut.
Besides my brother Alex (one of the stars of the new show Tree House Masters) John is probably one of the most creative and capable builders I know. He asked us what we most wanted help with while he was out visiting (this man thrives on staying busy), and building a new shed was at the top of our list.
Thankfully Dani’s parents were bringing their own accommodations or we would have had to store them in the add-on too. “Hey guys, you’ll be bunking with the cat. Please be quiet if you have to use the bathroom in the night, since you will be tiptoeing through our bedroom, or maybe you could just use the great outdoors…”
Unfortunately, or maybe fortunately for us, by the time they arrived, John had a knee injury he was nursing, and the prospect of building a new shed wasn’t sounding too thrilling…especially in our Georgia summer heat and humidity. Never the less, he looked at the condition of our two outbuildings and started brainstorming.
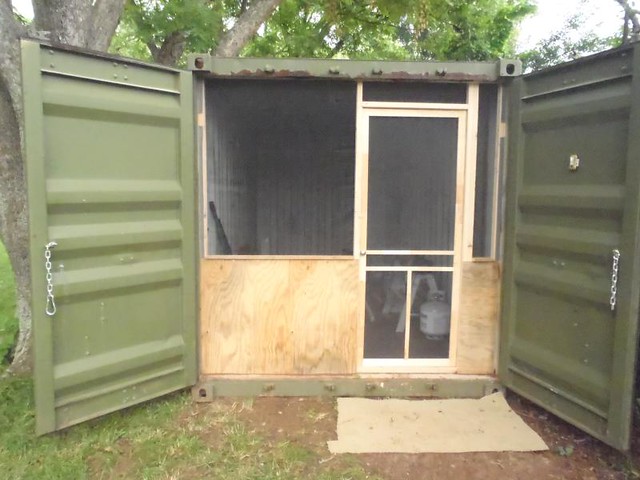
I said “maybe fortunately” because the plan John came up with is far better than any shed we would have had to leave behind when we make our eventual move to our own piece of land. He found a used 20′ long shipping container out in Newnan, Georgia and had it drop-shipped right to our backyard.
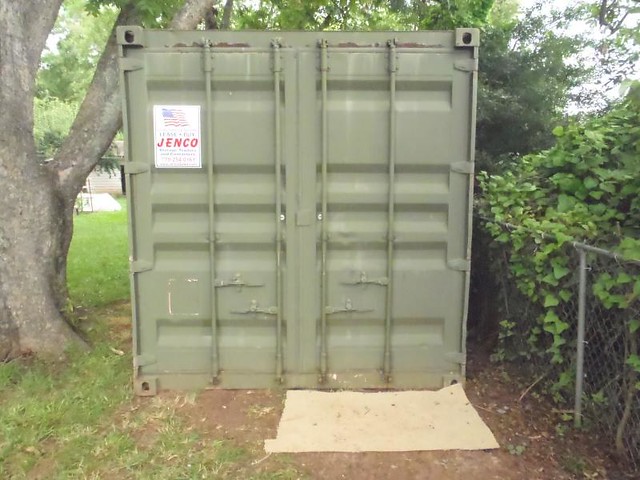
They tucked it into a perfect little clearing he had made for it by cutting back the jungle that threatens to overtake the fence that encloses our little homestead from the rest of the world. Best of all…it’s already camo green. I feel like a war vet hiding out in the woods somewhere every time I go in it.
Total manual labor on his part: half a days worth of hedge trimming. Score.
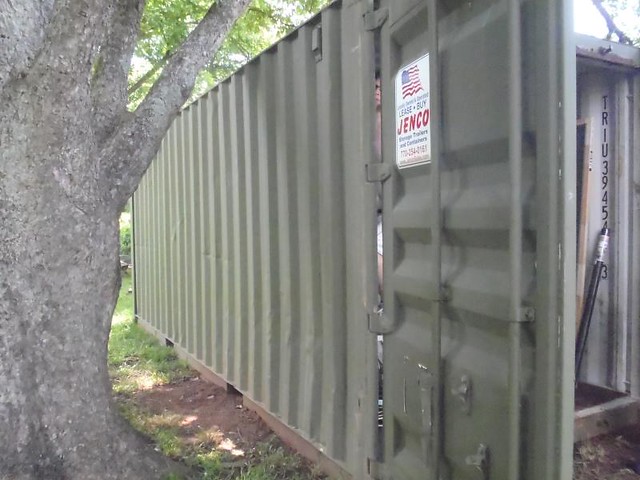
This is the view from the driveway:
Water tight? Check.
Relatively safe from super storms? Check.
Lockable? Check.
Bug free? As long as the door is closed.
Doesn’t hold fumes from gas residue in my chainsaw and weed-eater? Ummm.
Actually, we already knew the answer to the last question. John has four 40′ cargo containers at his home in Oregon and we used to use one of them to store our stuff in while we communed with the family before we moved to Georgia. I managed to gas out the space pretty quickly with the paint and gas powered tools I stored there. Oops!
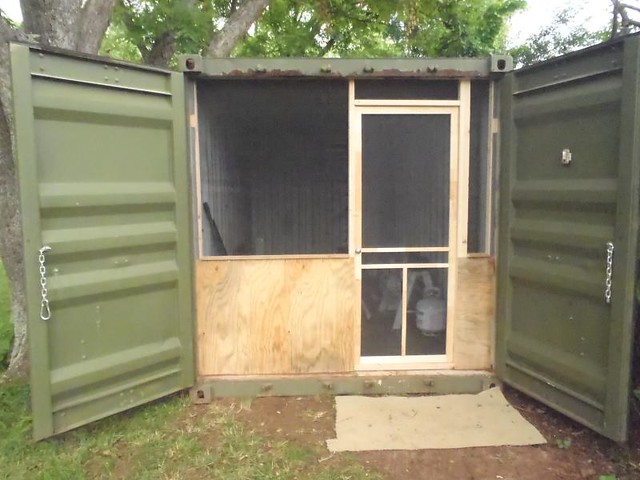
So the first order of business was to come up with a solution that would allow us to treat this space as the shop we needed it to be without damaging stored clothes, or getting high every time we went looking for something in it. We talked about a lot of options, but ultimately I didn’t like any of them because they involved cutting holes in the steel walls and using welding skills I don’t possess.
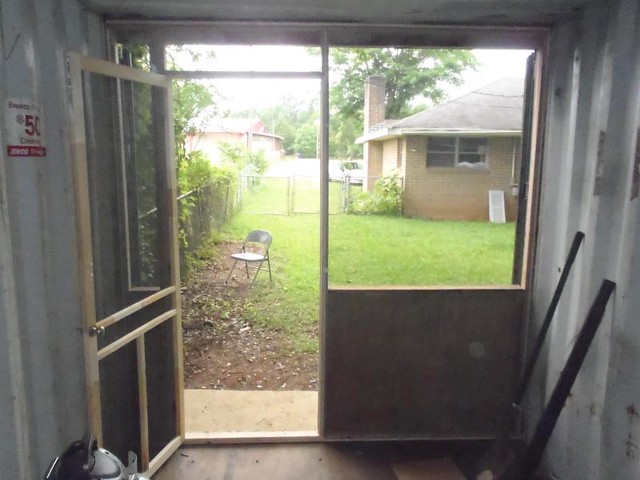
But cargo containers are very versatile buildings, and some people have built some pretty amazing spaces with them. Just do a quick online search to see what’s possible. What I needed was a shop front that would allow us to keep the doors open for long periods of time without allowing a super highway of bugs to develop. I’m pretty happy with the result my friend Jordan and I came up with in just two afternoons!
Let me show you:
I didn’t have much time to get this done, and I sort of innovated as I went with this project, so I don’t have the best breakdown of steps for you to look over, but I’ll explain some of the highlights.
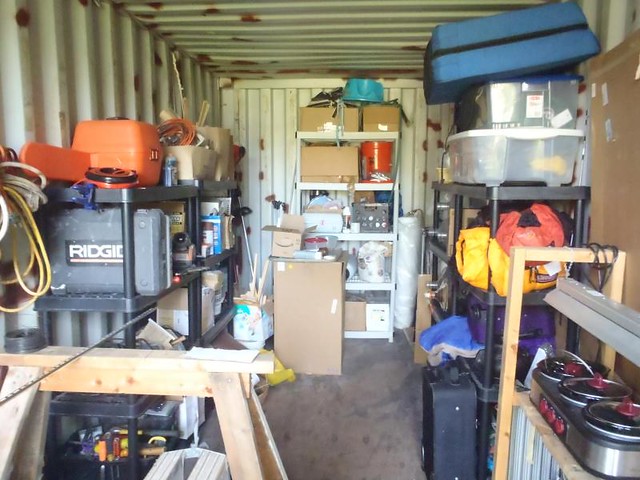
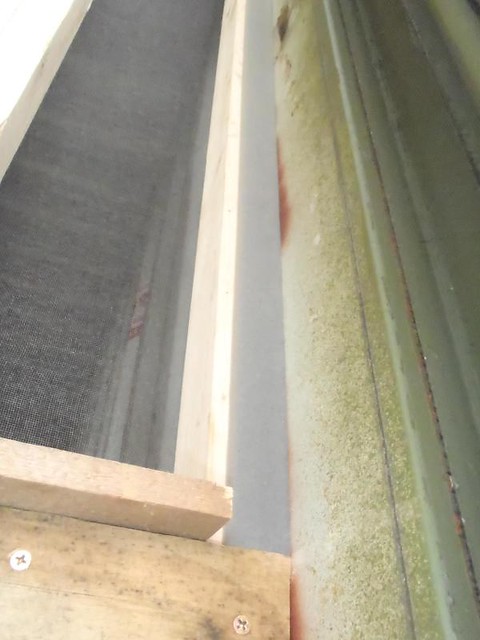
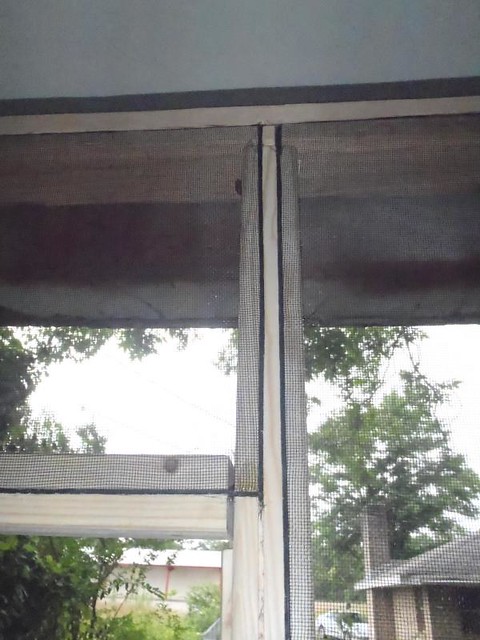
First, the entire structure is only screwed into the container in two places to the wooden floor. All of the other connecting points are fitted into the tie-down channel that you can kind of see just inside the door in the first picture I showed you above (look to the right of the vertical set of letters and numbers). I used the channel as part of the support structure by pounding tightly fitted blocks of scrap wood into them to create an anchor point.
Here’s a close up:

(The chinking stops at the top and bottom of the anchor block)
All in all, the whole thing can be removed by backing out 4 screws, not including the kick panels I installed to protect the screening that goes all the way down to the floor. The whole thing will drop backwards and turn sideways, allowing us to move large objects in and out that wouldn’t otherwise fit through the 32 inch screened doorway.
I used foam chinking from an air conditioning insulation kit to stop up the gaps on the side. I also used some 1/2 inch backer rod. So except for a few gaps around the door, this is a truly bug-resistant shop front.
I’m also pretty proud of the way I stretched the screen. I looked at buying pre-built channels, which is what many screened in porches around here use, but I didn’t want to pay for the extra materials. I simply cut a channel in the back of my 2 x 3 studs using my circular saw, and connected a few spots with my Dermal, flush cut tool to continue the grooves at their connecting points.
This was not a difficult step, but it will be important to remember to score everything before you install it. The only part I did in place was the flush cutting.
One of the best features of this design in my opinion is that I only have to open the main door to use the shop!

I eventually want to paint this so that it doesn’t warp in the event I forget the doors are open in one of our many Georgia monsoons, but we’ve been using the shop for over two months now, and it remains bug free!
That is significant since yesterday I brushed and hosed off the windows and eaves of our house and by the end of the day could count 4 or 5 substantial spiders hanging outside just ONE of our windows again. With the ability to leave the doors open, gas fumes don’t build up either and within a few minutes of opening the doors, fresh air is circulating throughout the shop.
If I ever needed to, I would use this same design again and again. But I think I’ll just take this shop with me when we go. And if I ever own any land worth camping and recreating on, I’m going to plop one of these down on it.
Voilà! An almost instant cabin! Imagine a forest valley panorama, or a river front view greeting you through the front screens of your own personal hunting lodge in the mornings…
Coffee in hand, and no mosquitoes slowly draining your life away…
[table caption=”Our Price Breakdown” class=”table table-bordered” tablesorter=”0″]
Item,Price
(7) 2x3x8 Studs,$16.24
32” Screen Door,$21.98
Self Closing-Screen Door Hinge Kit,$13.29
48”x25’ Fiberglass Screening,$19.49
Screen Repair Kit,$2.36
½ Backer Rod-20’,$3.48
(2) A/C Installation Foam Kit,$10.54
100’ .125 Screen Spline,$3.98
Total,$91.36
[/table]
Other Potential Costs:
I keep a variety pack of brass, wood screws handy and use them on almost all of my projects. The box runs about $8.00 (you can get them at Wal-Mart).
The plywood I used was a scrap from a previous project. It was ½ inch. If you have to buy a new 4×8 sheet, plan to spend about $21.00.
I always keep a gallon of BEHR Premium Plus Ultra, Polar Bear Semi-Gloss Enamel Exterior Paint around in our chosen, custom, off-white color. This is what I plan to paint the shop front with eventually. If you are buying a brand new gallon plan to spend about $39.98.
This post was shared at the Homestead Barn Hop!


Hi Kevin, Mom just shared this with me. I enjoyed your writing on this , super job putting the finishing touch on the storage container. very proud of you! …….John
Had to test out this fancy FB commenting option as well. Great article!
Neat DIY. What type of companies should I be calling to try and find old conex boxes like this?
Thanks for the article – well written and clear.
-Jared (www.jandjacres.net)
We have always found them on Craigslist or similar sites but there are companies that specialize in them out there. It just depends on your area but shipping companies or storage companies are usually your best bet. If they don’t have any they should be able to put you in contact with the right people.
~Dani
Awesome. Well done.