My sister-in-law was the first person to introduce me to ring slings. We were on vacation to a zoo when Kevin and I were first married. Our nephew was about 3 years old and our niece was about a year old. I was so excited to carry our niece around that day but after about 10 minutes of hefting her around with my chicken arms, I realized that I was not conditioned to carrying kids at all.
My arms burned, my neck got tied into a knot and I was just about ready to hand that cute chunky little girl back to her momma when my sister-in-law pulled out a long length of fabric. With raised eyebrows I had my first introduction with the glorious world of slings.
She took my niece and expertly arranged the sling around me with one hand. With a push on that cute little bum and a pull on the sling I suddenly had a chubby little face next to mine and none of my muscles were screaming in protest. I was amazed!
I carried that beautiful little girl all over the zoo that day until she passed out. I was fully convinced at that point but as if that wasn’t enough when our nephew started to tire of walking my sister in law took him and cradled this big 3 year old around her body and carried him until he fell asleep too!
So when I was pregnant with Noah I knew that a ring sling would be a must have on my list. I was given a beautiful chocolate brown Maya wrap which I used constantly. When one of my friends had her 6th baby she approached me wanting to try out the sling to see if she wanted to buy one. I just let her borrow it since I was using my Moby wrap for back carries with Noah at that point. She fell in love with it and after 6 months she decided that it would be better if she just bought it from me since she didn’t want to give it back!
I absolutely loved my Maya wrap and definitely recommend one if you are not wanting to make your own. But you should be aware that they are on the heavier side of a wrap. Phin was due in June in Georgia and knew that he and I would overheat if we used that heavy of a wrap outside.
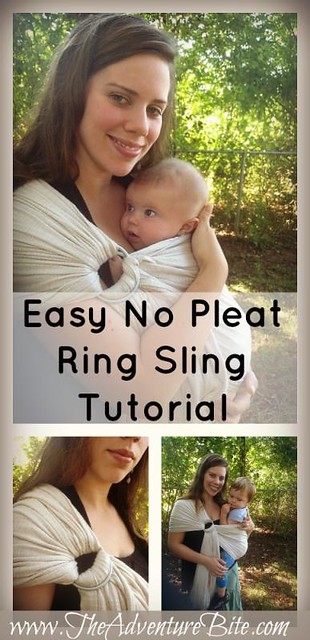
So I found this beautiful fabric at Joann’s and made up my own sling.
We use it constantly and Phin just loves it. After being asked constantly where I got my wrap at the Type A Parent conference this weekend I thought I would put together a little tutorial for you.
OK let’s get started!
Safety Disclosure: I am just a momma, I’m not a safety expert. Ring slings are very safe when used properly but please take the time to learn how to position your baby in them to keep their airways clear. I recommend using a heavy duty thread for all your seams and inspecting your wrap routinely for any seams that are weakening.
You will need:
1 1/2-2 yards of fabric
Heavy Duty thread
2 Sling Rings (I used Medium metal rings for this lighter weight fabric and am pleased with it)
Fabric marking pen or pencil
Measuring Tape
Note on Fabric: For carrying larger children your fabric must not stretch in either direction. For younger children some stretch sideways is okay but it should not stretch lengthwise.
Cost:
My fabric was on sale so this sling cost me right around $20 total including the rings.
Instructions:
Body of Wrap:
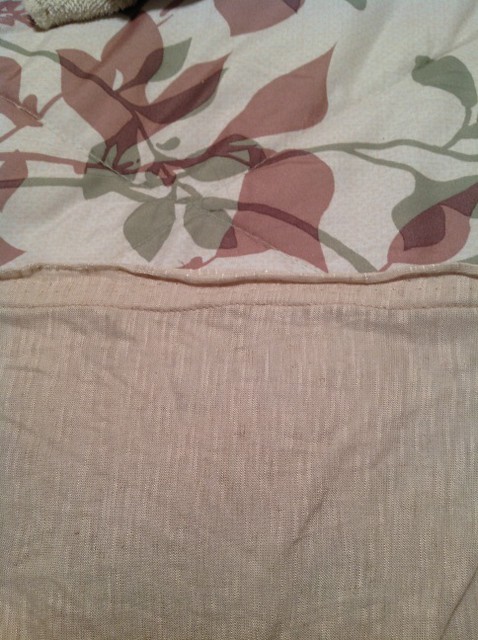
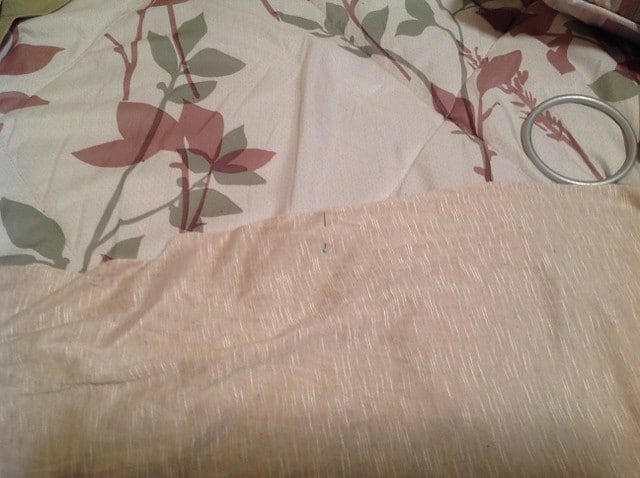
Lay your fabric out on the floor. If you choose a no-fray fabric that is 36 – 45″ wide you will not need to hem the sides unless you choose to do so. If the fabric is wider than 45″ or is a fraying fabric you will need to trim, double up and/or hem it. (For reference The Maya Wrap Sling is 34″ wide.)
My fabric was 60 inches wide and on the thinner side so I decided double it up to make sure it was strong enough to last. I wasn’t sure if I would like it doubled up but in hindsight I am so glad I did, it would have been far too weak with only a single layer.
Smooth out the fabric so that there aren’t any wrinkles. If there is a white edge you will need to trim that off. If you use a fabric that doesn’t need to be hemmed you are ready to start on the shoulder.
Single layer fraying fabric:
If you are using a fraying fabric in a single layer all you will need to do is hem the edges.
Check out this tutorial on how to stitch a basic double hem.
Double layer fabric:
If you are doubling your fabric I recommend using French seams on the body of the wrap. If you aren’t familiar with them you can check out this tutorial on how to stitch a french seam.
Basically you fold the fabric right sides together and seam it once.
Trim the excess (if you have a high fray fabric using pinking shears can be helpful here). Then turn it right sides out. Press the seam if needed and then seam again, capturing the excess of the fabric within the second seam.
Shoulder of Wrap:
Once you finish that you will have one end that is not finished. You could also french seam this edge and hand stitch the last several inches closed…..but it seemed like a lot of unnecessary work to me considering this edge isn’t visible.
So I simply folded over the edge and stitched a straight seam.
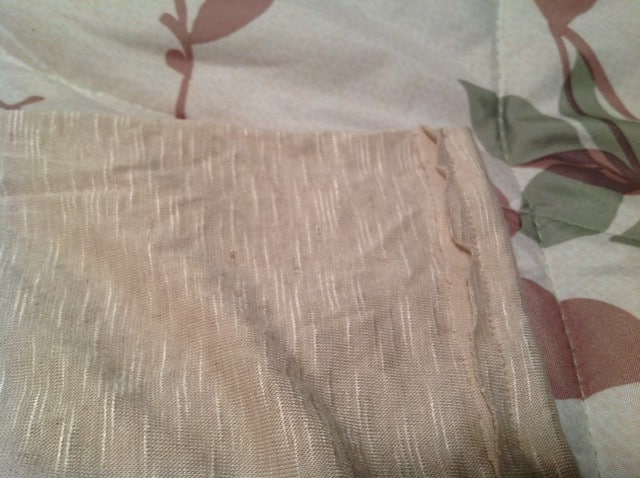
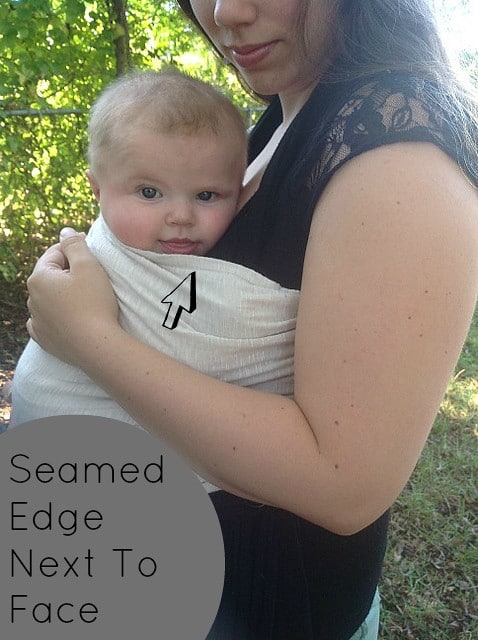
I primarily wear my sling on my right shoulder and I wanted the seam on the long side to be on the top edge next to baby’s face vs. under his bum. I felt that this would put less strain on the stitches.
This was the only somewhat tricky part on this sling for me. I had to decide which long edge I wanted to be near his face to determine which side to fold the fabric over so it would be captured within the shoulder and not visible.
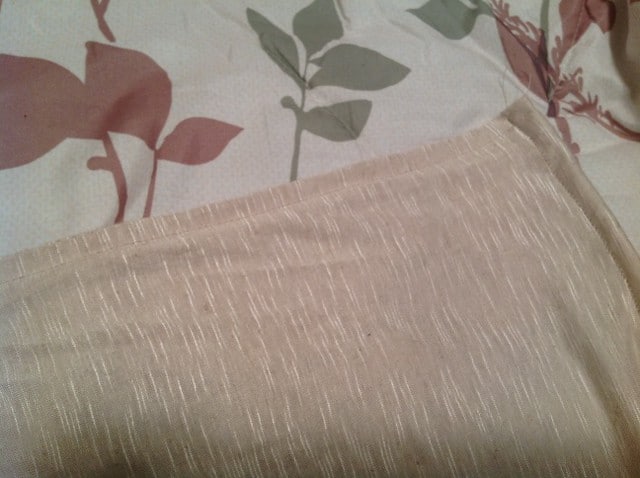
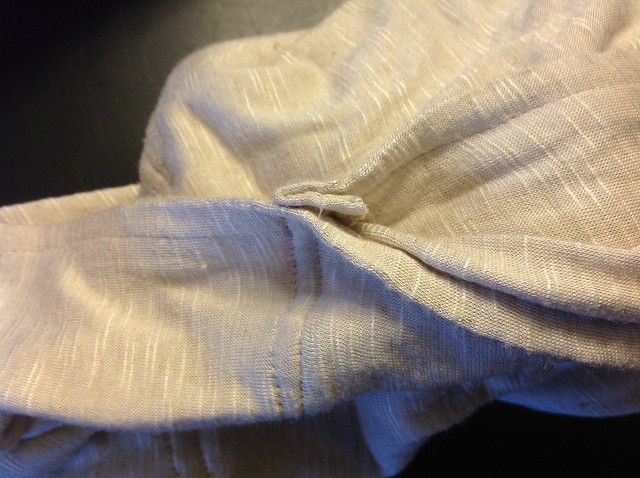
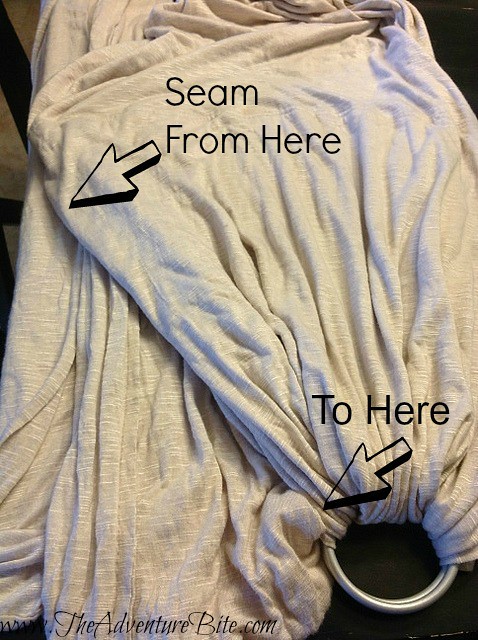
This is what it looks like on a close up of the finished sling. The body of the sling is to the left after the double seam and the shoulder is to the right.
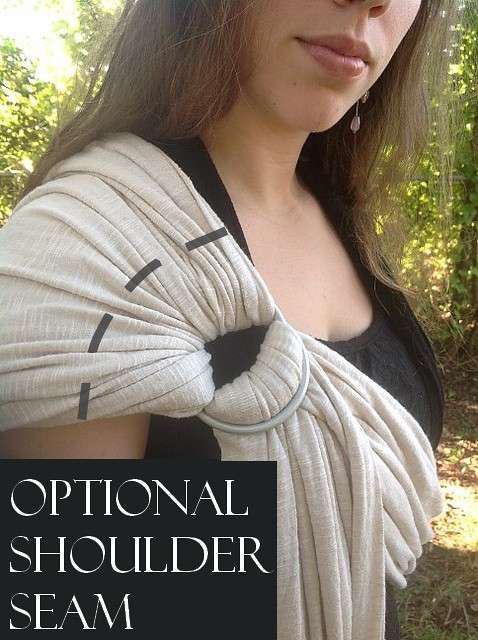
There are lots of different shoulder options for ring slings but most of them require pleating. I really loved the shoulder on my Maya wrap which was a solid padded shoulder complete with light foam inside. I wasn’t prepared to tackle that much work after just having a baby though so after some research I decided on a gathered shoulder.
This shoulder option provides the extra layer across your full shoulder giving a little bit of padding but is literally just a straight seam! Woohoo!
I couldn’t find any good directions so I made this up as I went.
The secret I discovered is you must measure and mark BEFORE you put the rings onto the sling.
Measure out how long you want the shoulder portion to be. Mine is approximately 14 inches from ring to seam.
This is how far it extends down my back:
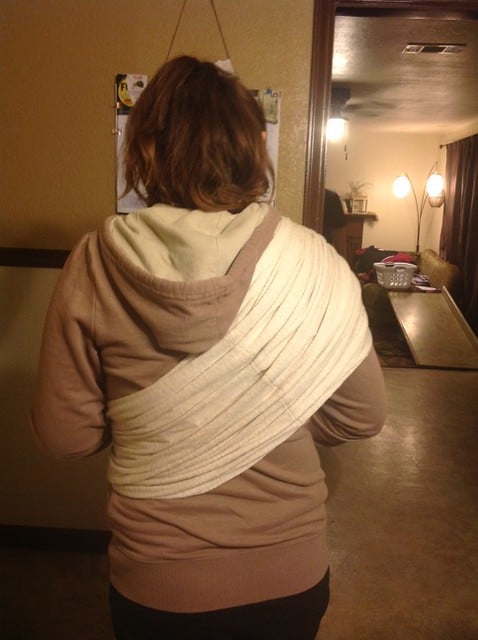
In hindsight I feel I could have made the shoulder a bit shorter to give myself a longer tail to help stay better covered up while nursing, but I still am very happy with it.
Since I wanted it to be 14 inches away from the rings I measured out 28 inches from the end and marked this with pins.
On the wrong side of the fabric use a fabric pen or pencil to mark this line all the way across the fabric.
(I actually didn’t have a fabric pen so I used a regular pen very lightly but it wasn’t photographable).
Now that you have a guide line on the fabric thread your fabric through the rings and pin the seam to the line.
Double seam to provide extra durability. You can use more seams if desired or a decorative seam here too as you will see these stitches.
At this point I called it good and have used the sling for many months this way. The rings move freely on the shoulder this way which I don’t mind.
But if you don’t want the rings moving around you can start at the bottom of the shoulder and seam the edges together all the way up to the rings so that they don’t move around on the shoulder
With a gathered shoulder like this I have found that I have to readjust the shoulder almost every time I put the sling on. I don’t mind it but you could easily put a seam a few inches away from the ring to help keep it more in position.
And that’s a wrap! 🙂
I am so pleased with how mine turned out and highly recommend every momma have a ring sling around. If you aren’t sure about sewing your own I definitely recommend you checking out the Maya wraps as a great alternative!
Happy baby wearing!

Shared at The Homestead Barn Hop