After our excitement with the new drawers in place we expectantly awaited our favorite cabinet maker’s arrival for final touchups on the Ikea countertops mitered edges. As you probably remember we decided on the Walnut Pragel countertop and so far have been delighted with the way it looks and feels.
In fact we thought the countertop looked great already, it definitely needed some clear caulk or something along those lines but nothing too crazy. But that’s not what Doug saw.
He insisted on returning and finishing the seam for us. He arrived shortly after we finished the drawers with his bag of tricks and showed us a few tricks of the trade. When he had left last week he said he had some kind of repair kit but didn’t really elaborate on what that meant so we were excited to see what he had to work with. When he arrived he pulled out these:
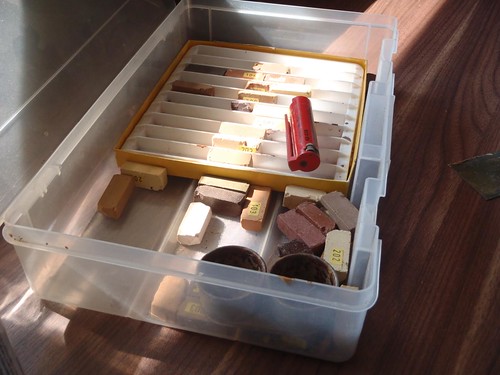
Which are his well used kit of the following:
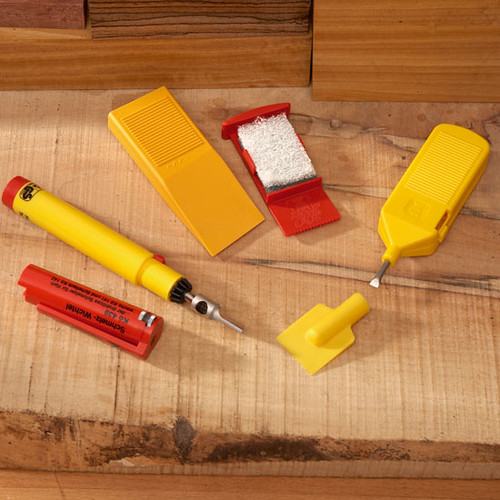
The tool on the top left is a Butane Hot Knife, then a scraper and a special sponge and another scraper that he didn’t use. And these:

These are hard waxes. All of these products are created by Konig Tools which is a Swedish company (link is for US distribution), and they are a professional line of products. He used four colors: 112 (Walnut Brown), 119 (Light Pearwood), 159 (beach/alder), 163 (Brown Mahogany).
You can purchase these at Konig’s site individually or in a kit. (We contacted the company to find out if the colors Doug used are in the starter kit and they told us that they can create a custom starter kit that will include any colors you like if you drop them a quick email.)
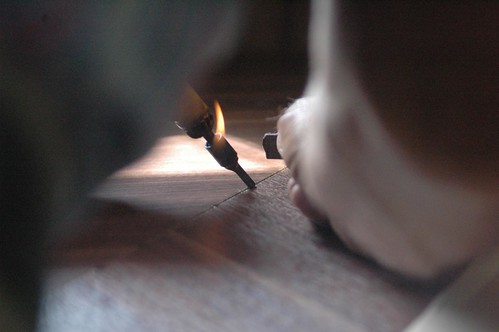
Basically the process was to light up the hot knife and get the flame going:
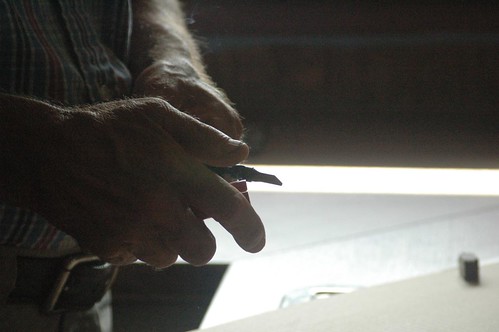
Then he dripped varying colors of wax into the seam.
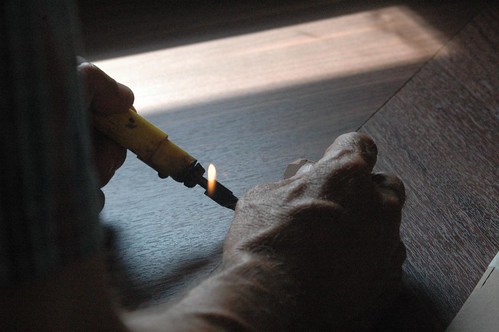
He would start the wax dripping by placing directly on the heated knife and then removed the wax from the heat while he worked the wax into the seam. It seemed that the knife should have burned the laminate with how firmly he pressed into the seam but it did not. Then he would drag it through the other colors to mix and blend them together leaving a variegated color pattern.
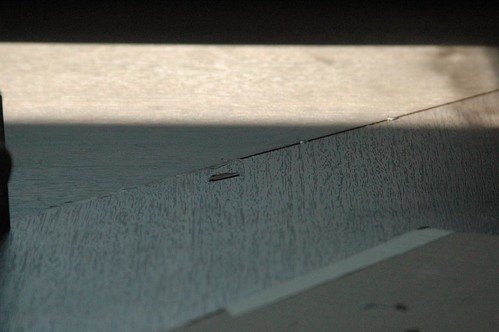
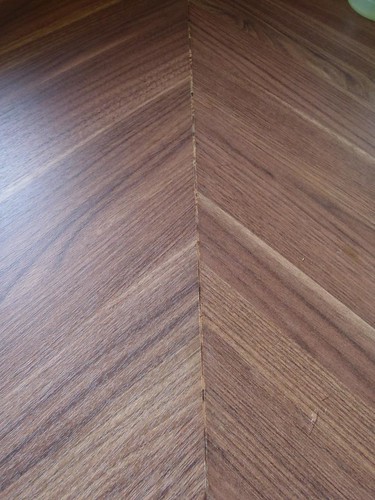
Allow to dry for just a minute. And then use the scraper to scrape it flush. Finally the buffing pad (which was felt on one side and scrubby- like a dishes scrubber on the other) was used to smooth everything out. The difference is phenomenal! It completely filled in the gap and with the variegation of colors it really blends in very nicely. You can see the part on the left is filled and the right side is what it used to look like:
He assured us that when using on real wood the repairs are even more indistinguishable because you can stain and seal over this product. Being a professional product it can get expensive to buy the knife and the waxes (especially since going with IKEA Pragel countertops means you are trying to spend as little money as possible and get a great effect.)
If we were to do this ourselves in the future and trying to save money I would be confident that we could achieve a similar effect with an old iron and melt the wax into the crack just like you do when you are waxing ski’s or snowboards. The knife is nice to get it into the crack deeper and drag the colors together but with a partner and a butter knife you could achieve a very comparable effect in my opinion. An old credit card or plastic wax scraper would work just fine.
The minimum order on Konig’s site is $25 plus $20 shipping at this point so your looking at $45-50 minimum.
With the countertop in place this step pretty much wraps up the installation process. We still have to install the dishwasher vapor barrier and attaching the dishwasher which we will be sure to show you!