Updated June 2016 with current links
After months of frustrating mornings filling and often refilling the rabbits water bottles we decided it was time for a new rabbit watering system. We decided on a 5 gallon DIY watering system that we had seen on several sites for the past year or so.
Check it out!
Here it is in all its glory:
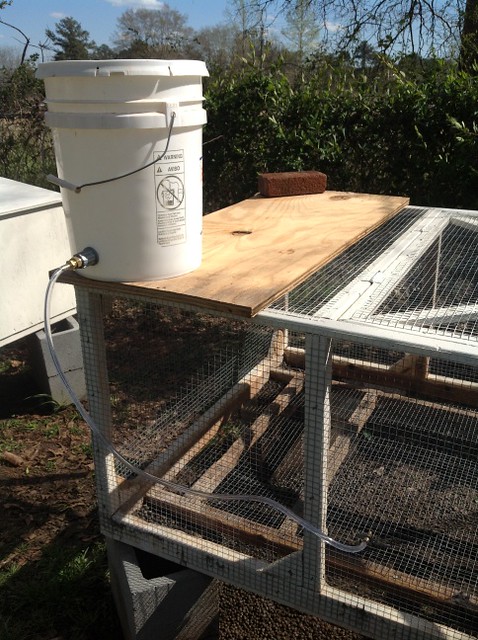
Super simple and basic. We whipped these each up in under ten minutes once we had all the parts so don’t be intimidated by it!
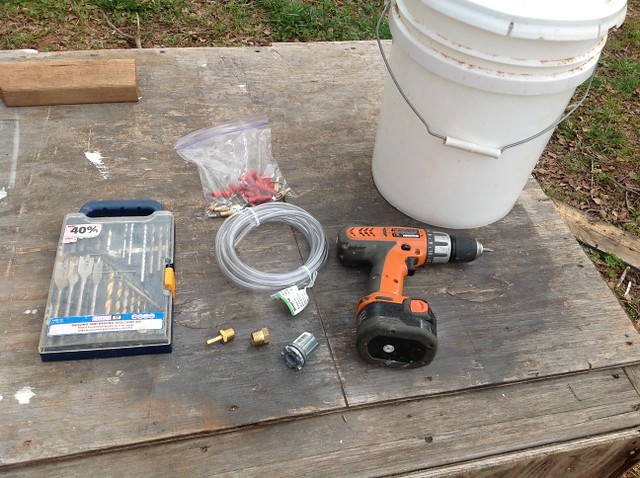
Tools You Need:
Drill
1/2 inch drill bit
Petroleum Jelly or Plumbing Tape (optional)
Here is our parts list and cost breakdown:
(Prices are from our local Home Depot but we linked to Amazon in case you can’t find the stuff locally or want an upclose picture of the parts)
UPDATED JUNE 2016: The Brass Barb’s size was incorrectly listed backwards on here and has been updated with correct measurement and links. All other parts are accurately reflected here.
A clean 5 gallon bucket per waterer – Free or under $5 new x 2
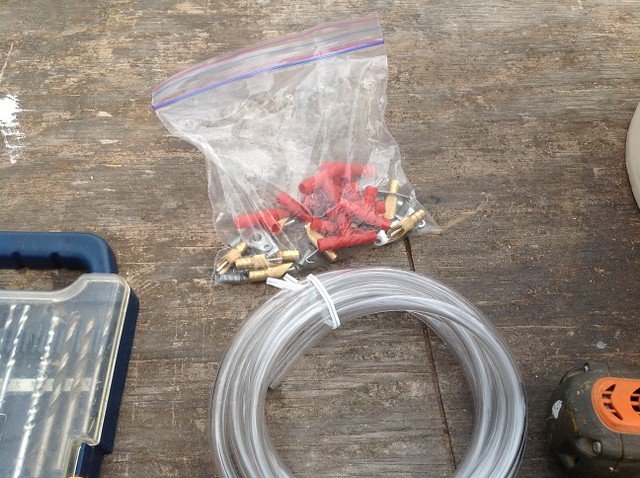
Rabbit watering nozzles – $8.95 for 10 of them (we used 1 for each waterer)
3/8″ by 1/4″ clear vinyl tubing $3.11 (Enough for 2-3 waterers)
Brass Barb 3/8″ x 1/4″ Amazon or Home Depot $3.40 x 2 (3/8″ is the large end and 1/4″ is for tubing barb end NOT the other way around!)
Brass Hex Bushing 1/2″ x 3/8″ $2.80 x 2
1/2 inch Zinc Conduit Hub $2.98 x 2
Total Cost for our 2 Waterers: $30.42 plus $2.13 tax= $32.55
Total Cost per Waterer: $16.28
Making Sure You Have the Right Size Parts:
The process of this is 1/2″ zinc hub —> 1/2″ Hex Bushing step down to 3/8″—-3/8″ Fitting step down to 1/4″ hose barb—-1/4″ Inner Diameter tubing—>Rabbit water nozzle.
Note on tubing size: All the rabbit nozzles say they use 5/16″ tubing but are prone to complaints of leaking at that diameter. We used 1/4″ tubing with great success, takes a bit of work to get them on but they don’t leak.
These are easily worth twenty times the cost for the amount of peace of mind they provide in knowing your rabbits will have adequate water all day, especially during the hot summer. They could easily be the deciding factor on whether a rabbit will survive through our summer heat here.
I have to admit I was a bit skeptical when Kevin picked these out because I thought it looked a lot more complicated and a smidge more expensive than the ones I had seen around. Turns out he was right and this is a super fast and simple way to hook it up. It was totally worth not having to mess with silicone or any other adhesives by going this route.

The rabbit nozzles come with springs for the cage and red T’s to split the hose for more nozzles. We have had no problems with having a single nozzle for up to 10 rabbits in the same cage as the water is always available so they don’t overcrowd it all at once like they do when you refill the water bottles.
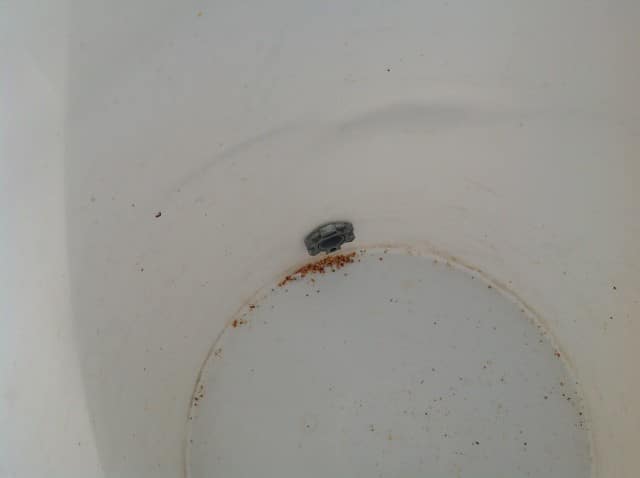
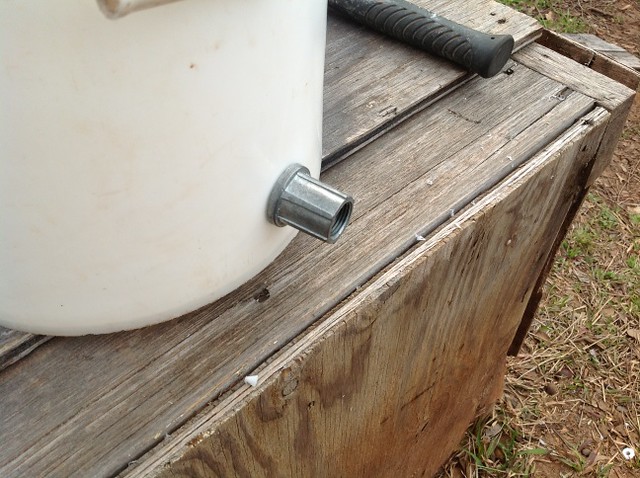
Simply drill a hole in the bucket about an inch up the side (to prevent any little bits of grit from clogging the line), and pop the back end of the electrical piece through the hole. You may need to widen the hole a smidge to get it through.
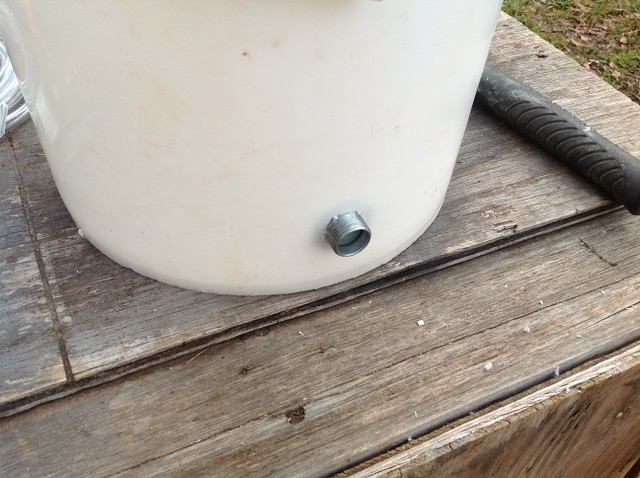
Then twist on the front half.
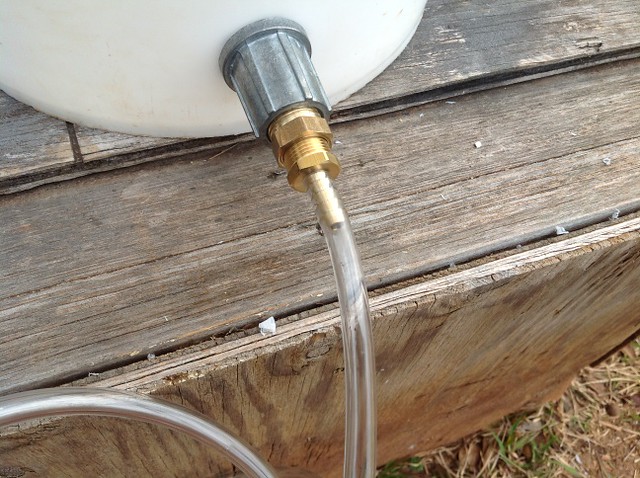
Add the converter and the brass nipple. This area does leak a little for us on the one I put together, so you may want to try a little petroleum jelly or some plumbing tape on these threads and a pair of strong hands to really get it nice and tight.

Connect the water line.
And measure out how long you need the hose. Then cut and attach the water nozzle. If you have multiple cages this is when you would add the splitters and run the hose out to various nozzles that could be attached to the individual pens. We have large communal pens so we currently just use the one nozzle per waterer.
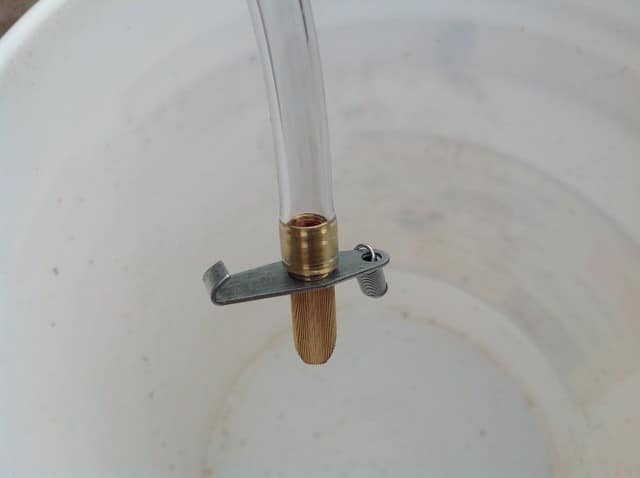
After that its as simple as hooking the spring on the cage and pulling it tight to hook it on the wire! Viola! No more messing with those silly little water bottles ever again!
Once you get it setup be sure to hold down the nozzle to release the air in the line and get the water flowing. You will also need to show a few of the bunnies how to get it going for a minute or two by holding down the nozzle so they see the water dripping. All of ours picked it up really quickly but leaving a water bottle on the cage for a day or two just as a precautionary measure is never a bad thing either in case one doesn’t figure it out.
Hope you love them as much as we do!!


I added two 90’s to the tank with clear tubing between them as a sight glass to monitor water level as I used a 55 gallon drum mounted about 7 feet up. I’m only using mine this way until I get my colony built. This allows me enough flow for the run of cages I have that is approximately 30 feet long. When I move to the colony setup, I’ll use a lower elevation system to minimize pipe length and freeze risk here in central Texas. I will also have fewer nipples per tank and run tank heaters in each of them.
Wonderful easy system! I added a rubber O-ring to conduit. No leaks! Thanks for a great easy functional idea!
So happy to hear it! Thanks for the lovely comment 🙂
Great system. I have a suggestion. Change your clear supply line to an opaque supply line. The sun light will promote mold, algae and bacteria growth in the supply line. Also, adding 2 tablespoons of apple cider vinegar per gallon of water will help keep the system clean and reduce the smell of your rabbits urine.
Good ideas thanks!
Well, bought all the parts from your links. Totally have the wrong sizes listed there =/ That Male Barb Hose/Tubing Fitting Connector piece is entirely the wrong size. Our tubing didn’t fit into it, nor did the other brass part. I think we might have also gotten the wrong tubing by going off of Amazon’s suggestion, not sure, but you need to update your links because anyone else who trusts them like I did is throwing their money away. At least put a heads up on there that it’s not the right listing. It looks like someone in the comments section has the correct part listed (wish I saw that sooner!) but I’m not sure and wary about buying anymore parts online now.
Otherwise wanted to say this is a brilliant idea and thank you so much for posting it and telling us how you made it. I’m so tired of filling up those dinky little bottles every day or every other day, haha.
Wolf,
Thank you so much for your note! I’m so sorry this was incorrectly listed, not sure how we missed the other comment alerting us to this. I have updated all the links and post with the accurate information after detailed research into this. You are looking for 3/8″ outer diameter 1/4″ inner diameter tubing…not sure what Amazon suggested but what was listed for tubing was accurate. The barb was indeed listed backwards which would render it unable to work in the bushing and the tubing as you mentioned.
I have also included the link to the Home Depot version of the barb. Hopefully you will be able to grab one locally and solve the issue quickly and on the cheap.
Sorry again, we take great pride in providing accurate tutorials so this is something we take very seriously. Thanks for your note!
Dani
Thank you so much for looking into this and fixing the links!! Especially for including the link for the Home Depot version of the barb; we’ve got one right down the road, so that’s incredibly helpful. My rabbits and I appreciate it a lot! Hopefully now we can follow the tutorial and get them all set up this week. Definitely wish I used your link for the tubing though instead of Amazon’s suggestion; the one link I didn’t follow, go figure! Good to know the one you have listed is good. Thank you again, especially for looking into this so quickly after I commented!
You are very welcome! Glad to help keeping those bunnies with plenty of water this summer 🙂
Dani
Thanks for such great demonstration. This just give me an idea on doing some twist and I can make an automatic watering system for my potted plants.
Great idea David!
Thank you for being so detailed in your blog post! I’m going to to follow these directions to build my own rabbit watering system. So glad to have watched your youtube video and then it redirected me to your blog page.
Have made this a little didifferent using a 55 gallon drum and running it to all my bunnies and some different fittings!
How do you deal with the water freezing in the winter time?
I am wondering the same thing. This tutorial worked amazing all summer, but it’s not holding up to Colorado winters. Any ideas?
Not sure on winters, we’ve only used this system in Georgia where the winters are quite mild.
I imagine if you made the tubing shorter or even setup the bucket to hook right into a single nipple and then put in a tank heater into the 5 gallon bucket you might be able to get that to work. But you’d want to mindful of heat/electrical hazards with that of course. The tubing is going to be the primary freeze problem point so minimize your runs on that and keep the water warm would be my initial thoughts.
Something like this de-icer looks about right for 5 gallons: https://amzn.to/2QatfS4 but I’ve not used one myself so no guarantees that it would be the right fit.
Hope that helps!
Hi! I went to home depot and picked up all the supplies to make these! I am so excited! I think you should add the Home Depot sku number for the conduit hub —->Halex 1/2 in. Rigid/IMC Water-Tight Conduit Hub Model # 91631 Internet # 100129507 Store SKU # 394009<—- as the home depot associates had no clue what i was talking about. I placed my order online and picked it up in store a little later. It was much easier than trying to search for it! I will let you know how the waterers turn out!
Thanks for the info April!!
Hope they turn out awesome 🙂
Just wanted to let you know that the brass barb fitting on your materials list (3/8″ I.D. hose x 1/4″ MNPT) is wrong for this setup. You actually used a 1/4″ I.D. hose x 3/8″ brass barb (the opposite from listed). The proper part can be found on Amazon here: http://www.amazon.com/Hose-Male-Tubing-Fitting-Connector/dp/B007QTK2LA
Otherwise, great instructional.
LOVE the how to video! Great job guys ;-).
Pretty cool. It looks very functional yet simple, and you gotta love that!
This is awesome, I love it! I will definitely be making some of these for summer, as it gets very hot here.
~Kristi@Let This Mind Be in You
Looking good – Keeping the rabbits well watered and maintaining your sanity – now that is a WIN/WIN!